- A Need for a Makerspace
- Behind Every Great Maker is a Shop
- Shop Wall Paint
- The Floor – Garage Shop and Makerspace Remodel
- Makerspace Cabinets and Workbench
- Electrical – Garage Shop and Makerspace Remodel
- Climate Control – Garage Shop and Makerspace Remodel
- Final Product – Garage Shop and Makerspace Remodel
- Resources Discussed in this Article
A Need for a Makerspace
Since its inception, all of my Starter projects and general tinkering has taken place in various areas around my home. That may sound convenient but after some time you begin to realize that it definitely is not. Especially when making and dyi-ing turns into a home based business. Yes, Starter Design is in fact based out of our home – and for a while this was completely tolerable. But once business started to take off, remnants and shavings from 3D printed parts, random circuit boards as well as wood and metal bits laying about all over the house became a nuisance. Not to mention the needs of certain projects being too much for the spaces in which their construction was performed.
I’d often find myself working at my desk – a melamine finished particle board surface located in the house’s family room. While on most days this setup was alright and in some sense entertaining since I could make and watch TV at the same time – it would most often result in an unsightly mess. Quite often projects would demand much more than what the space could provide. This typically resulted in the desk, and often times the entire room being completely taken over by random bits and pieces.
The amount of available workspace afforded by the various desks in the home would often not be enough, not to mention the amount of lighting available was often subpar. As someone who works professionally in the manufacturing industry, let’s just say that insufficient elevated work areas and lack of lighting become simply annoying after a while. Don’t even get me started on storage space either.
All that was available at the time was a 3-drawer plastic organizer located just underneath the desk on the lower level of the home as well as storage cabinets located above the washer and dryer in the utility room. Again, this was not bad at first but as the number of 3D printers in the arsenal increased as well as the number of tools and associated equipment, it became clear that something greater was needed. It was time to embark on the journey that was the garage shop and makerspace remodel.
Behind Every Great Maker is a Shop
That honestly feels a little unfair to say, but it’s quite true. A shop is a shop no matter its shape, form or size. For some a shop is a desk, the living room or even the kitchen table. For others a shop is a 200,000 square foot industrial workspace complete with complex machinery and overhead cranes. I’ve had the privilege to work in both over the years. As a maker in the confines of home however, options can be limited. Cue the garage.
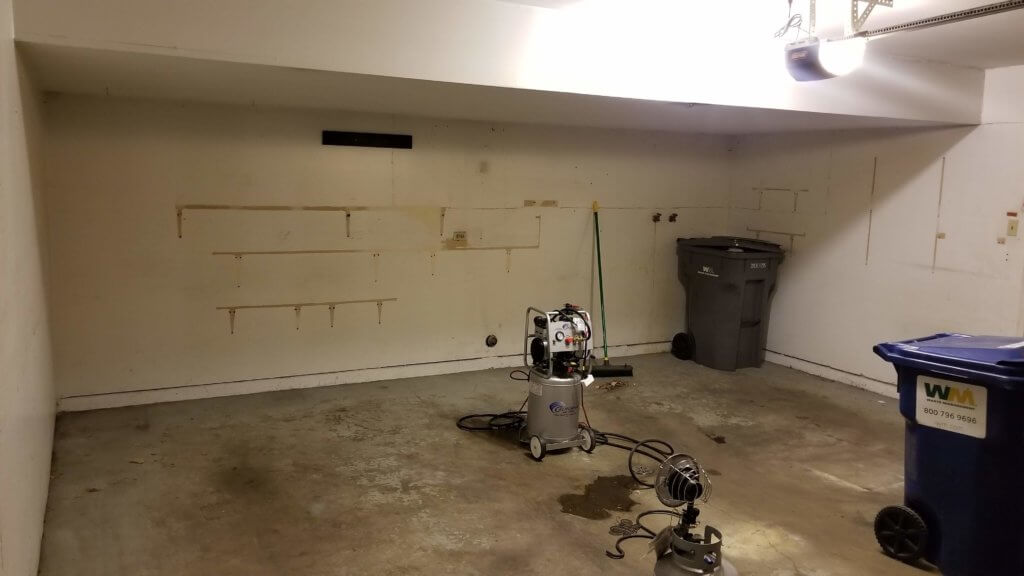
The garage – universal home of cars and random junk, drafty in the winter, sweaty in the summer, dimly lit, crawling with spiders – all things considered, a perfectly good dungeon. The garage is the typical space where the homebound maker comes to do work. In its basic form however, this space still isn’t normally suited for productive or creative work. This was the case with my garage, depicted above. But as business expanded, so did the need for a dedicated workspace. So we decided to turn our little dungeon into a productive shop and makerspace. Follow the journey of the garage shop and makerspace remodel.
Shop Wall Paint
After clearing away all the random junk and building materials accrued in the garage, the first focus was the walls. They were in disrepair and in need a lot of attention. The plan was to get the floor epoxy coated. Typically when doing something like that you want to paint the walls first. There’s nothing like spilling paint all over your brand new floor.
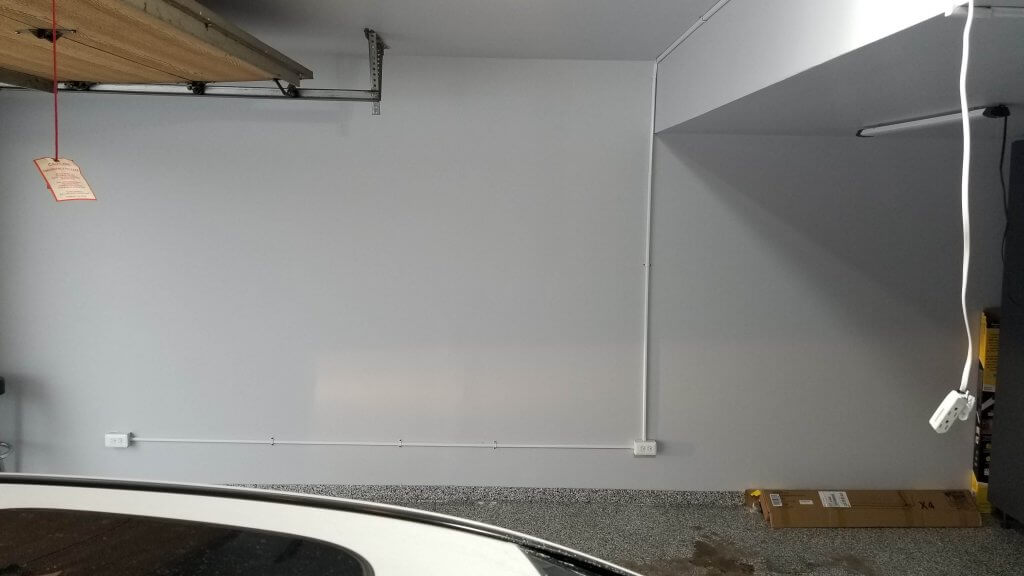
We wanted a neutral color, but something that brought a modern look to the shop space. The paint had to be durable given the nature of the space, but also needed to bring some brightness to the once dimly lit dungeon. In a shop environment it’s nice to have the walls reflect a bit of the light to brighten up the space even further. All things considered we decided to go with modern light gray version of Sherwin Williams Super Paint.
Super Paint goes on nice, easy and is self leveling. We chose a satin finish, which for this paint is relatively durable and can be wiped down when necessary. It’s amazing how much a fresh coat of paint will immediately make a space look so much better, especially when you have a great painter. We decided to hire this one out to one of our professional painter friends to save on time and consolidate resources.
The Floor – Garage Shop and Makerspace Remodel
The floor may have arguably been one of the worst aspects of the garage. Like most concrete garage floors it was dirty, stained with paint and had one really bad crack running straight up the center of the garage. Interesting fact is that’s actually the reason why most modern garage concrete floor slabs have a seam in the middle – to allow the floor to move. Without that stresses build up and the concrete will crack over time – especially if you live in an area subject to drastic temperature swings like we do. These are all things I learned during the consultation with the epoxy flooring experts who we hired for the job.

For the floor we wanted a surface that was durable given the nature of the work to take place in the space but we also wanted the floor to look attractive. Sure we could have gone with a basic factory gray epoxy floor coat, but where’s the fun in that? Instead we chose a Full Broadcast Domino floor with black white and gray chips finished with a clear epoxy top coat.
We went a step further and added reflective prism flakes to the floor to give a little extra flair. The results are one attractive floor. Not only that but the floor is now durable and has utility. We had the cracks sealed with a polyurethane urea elastomer, and then the whole floor sealed with a moisture barrier to prevent future damage to the top coat. The finished floor cleans easily with a mop, and can support the weight of all our future cabinets, tool boxes and even our cars. This is the ideal floor for the shop.
Makerspace Cabinets and Workbench
At this point it was time for a little shop infrastructure. One of the biggest gripes we had with making around the home was the lack of storage space for tools, projects and materials. Another problem was the need for a large dedicated surface suitable for the type of work to be performed. To solve these issues we hired a local cabinet builder to construct cabinetry and a workbench suitable for the shop.
One of the interesting issues we had was the styling. The material of choice for most garage cabinet builders is melamine backed particle board. Melamine is a fine choice for cabinets in a shop like this since it’s somewhat scratch and impact resistant and presents a fine surface finish. The problem however are the colors that melamine cabinet panel manufacturers offer standard. None of the standard colors matched the color pallet we were looking for.
We desired something in the naval blue category, which would compliment the light gray walls well. We quickly learned however that this is not a standard option for most panel makers. Part of what drove our choice in cabinet builder was that he had access to a broader range of melamine finishes at decent lead times and prices. This brought comparable color options within reach and while none of these colors were the exact naval we were looking for, we were still able to find one that worked.
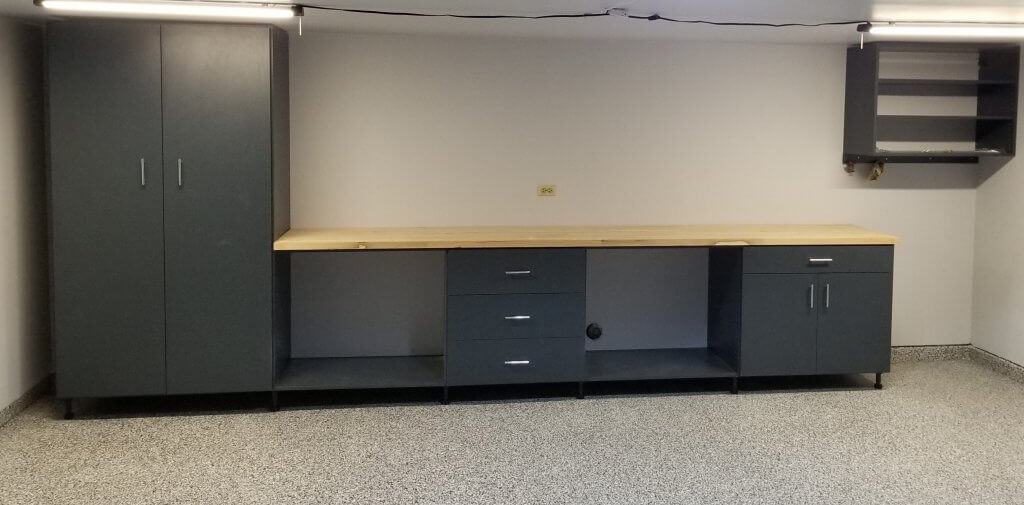
We decided to implement a variety of cabinet storage options. One of the sections has three large pull out drawers. These drawers are very deep and are great for storage. To the far right we added another shallow drawer, with double cabinet door storage and shelving just beneath it. Floating on the wall above this location is another double cabinet door with more shelving. And to the far left we chose a very large, very tall double cabinet door with large wide and deep shelving. This ceiling height cabinet would be great for storage of larger tools, materials and supplies.
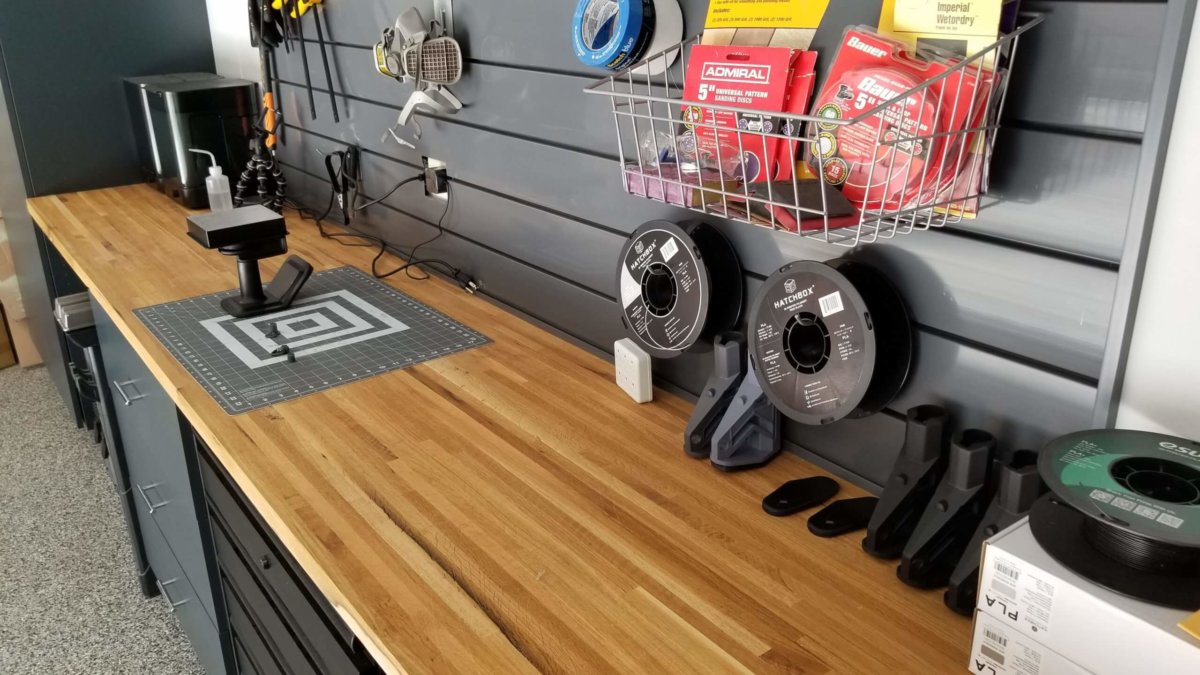
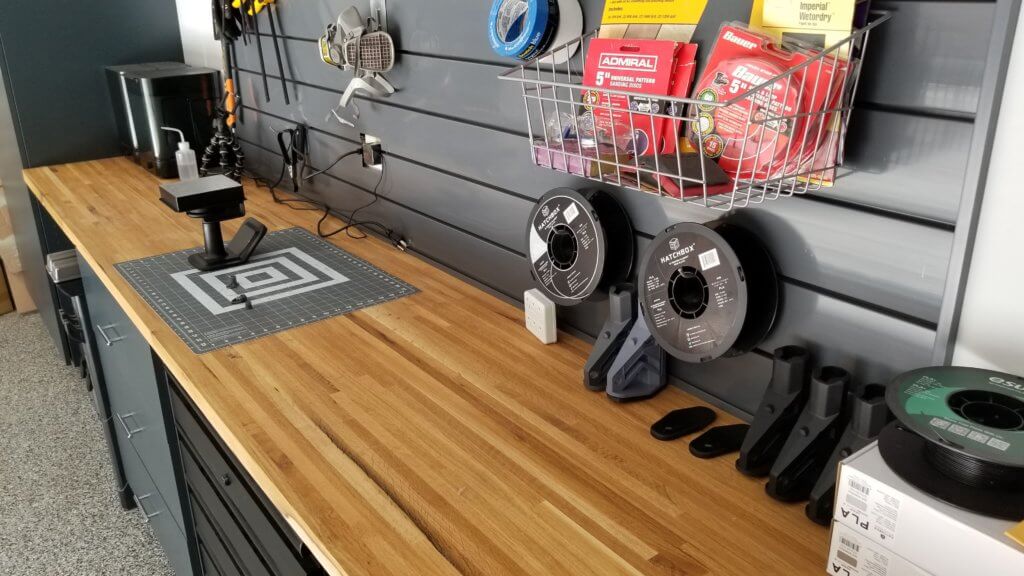
Another issue was the bench top. It was my desire to have a beautiful butcher block work surface, preferably made from maple or cherry wood. Maple makes an excellent work surface. Its forgiving, durable and can take impacts as well as exposure to mild solvents. The cabinet arrangement left space for one twelve foot long bench top. That’s a pretty large bench top. Finding such a top in butcher block maple as one continuous piece is a challenge. Most builders quoted just this bench top alone at well over $2,000. This was way too expensive for my taste. The only other options however were a mica or melamine backed counter top. Definitely not the look I was going for.
Melamine although good for the cabinet panels with its slight impact and scratch resistance to me would not make a good work surface. Sustained impacts and heavy work over time would definitely show, eventually leading to cracked and shattered melamine. Maple on the other hand not only looks good, but can be sealed, protected and refinished if required which ultimately extends the life of the surface. My mind was made and I knew what I wanted. We needed options however.
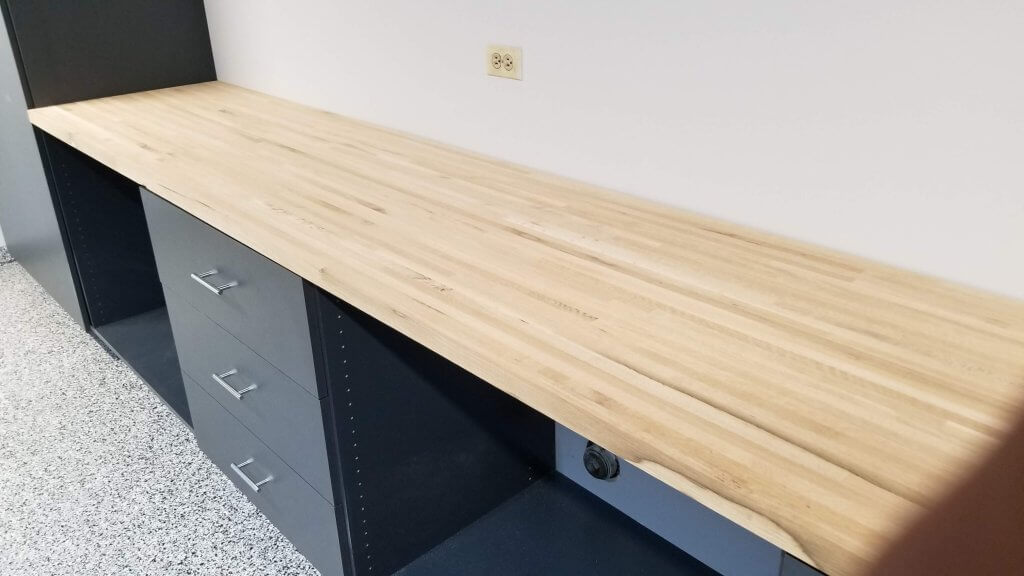
The cabinet builder we hired stepped in to save the day yet again. He recommended having a raw slab of maple wood cut by Floor & Decor. Floor & Decor carries beautiful slabs of maple butcher block in 25″ x 144″ lengths – exactly the size we needed – for less than $400. The wood comes raw, so you have to apply the surface finish of choice yourself. For this we chose a premium oil/wax from Rockler which provides a great surface protectant for the wood and increases its ability to withstand mild solvents. $600 later we had our beautiful work surface installed and ready for use.
Electrical – Garage Shop and Makerspace Remodel
Another issue that needed to be worked out for the shop was power. Up until this point the only electrical outlet in the garage was located in the center of the front wall. Aside from not being located in a very practical location, it simply was not enough. I needed the capability to run several pieces of equipment in the garage simultaneously, such as an air compressor, power tools, and 3D printing equipment. There was also the need to improve the lighting.
In order to do this I was going to need more power outlets. So I called in the electricians. After receiving a few quotes I quickly realized that routing new power through the walls to nice flush mounted receptacles was not going to be an option. For starters the shop was nearly complete and tearing up the newly finished walls would be counterproductive. Additionally, snaking power from the circuit breaker panel which exists elsewhere in the house was going to be a very costly venture. The garage shop and makerspace remodel needed to be a cost efficient venture. For electrical work of this sort I received quotes between $2,000 and $4,000. Definitely not an option at this point
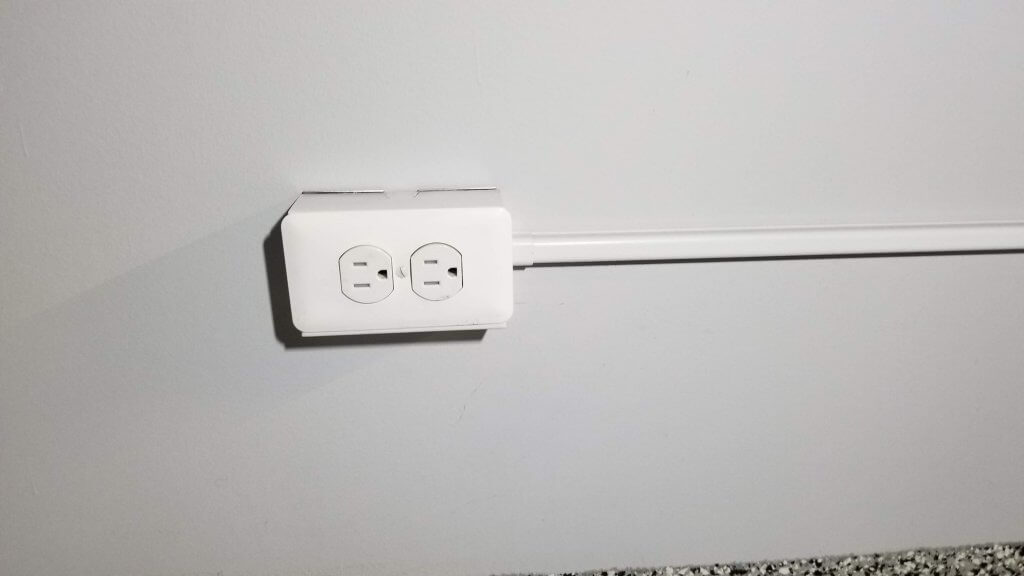
There was another option however. While exploring possibilities I happened across the electrical surface mounting systems available at most common home improvement stores. Instead of routing new power through the walls, these systems allow you to splice power from an already existing wall outlet or light switch. Surface mounted right to the wall is a wire track where all the new wires are ran through. Mounted to the wall are the new outlet boxes as well. This allows you to drop outlets anywhere you like while utilizing the power that already exists in the room. This turned out to be a much cheaper option. Not having to open up any walls also made this more practical for where we were in the build. For about $600 a local electrician who was familiar with the system was able to do the work.
Climate Control – Garage Shop and Makerspace Remodel
This one was a struggle. How on earth was I going to control the climate in this shop? This was an important issue to solve too since we live just outside of the city of Chicago. Sweltering heat in the summer and frigid below zero temperatures in the winter. This shop would feel every degree of each of those swings. I had to find a solution that would be both practical and cost effective.
I considered a few options here. First I thought about linking my already existing central air system to the shop to control the climate. Piping ductwork from a convenient spot in the house and knocking in supply and return air vents in the shop could accomplish this. Ultimately I decided against this since I didn’t want the house’s central air handler to be responsible for removing all the moisture from humid shop in the hot summers. I also didn’t feel like tearing up walls at this point.
Along these same lines though I considered getting a mini-split system. As a self contained-ductless A/C unit that mounts to the wall in the room you want to climate control, mini-splits are a versatile option. They usually cost a couple thousand dollars and are nice since they can be ran in reverse to act as a heat pump in the winter as well. Outside is where the compressor and condenser units go however. And the line to connect the units ran through the walls. Similar to standard A/C units. Also not an option at this point.
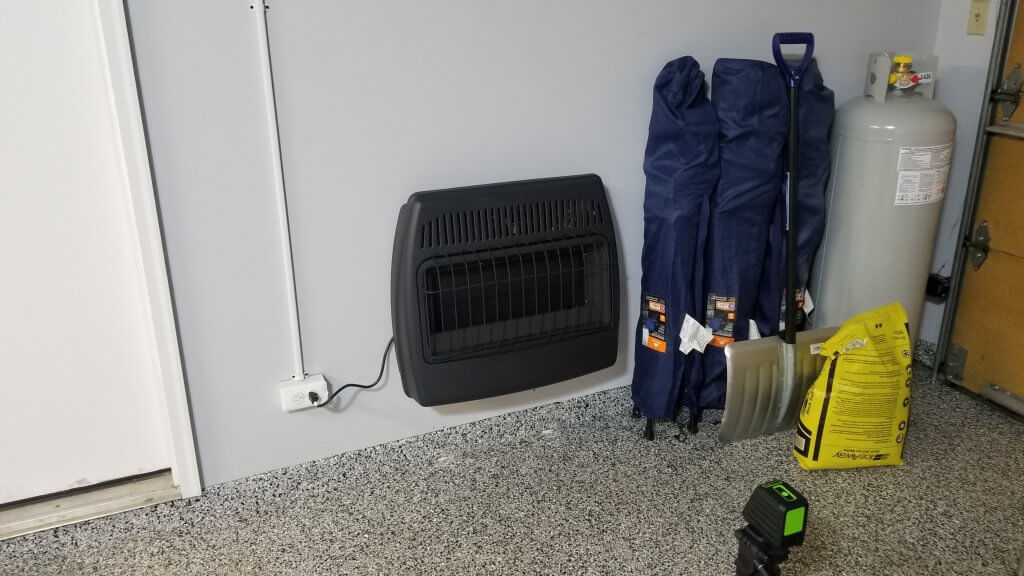
I needed a simpler solution. At this point I decided that I was more uncomfortable with being cold in the winter than I was with being hot in the summer. This narrowed down the option pool quite a bit. So I decided to go with a simple wall mounted heater to accomplish this task. These wall heaters typically come in two flavors, propane fueled or natural gas. I wound up buying a unit that could do both. We built the shop in the winter so I was ready to plug and play. I purchased a unit and installed it with a 100 pound propane tank with the intent on converting to natural gas in the future.
Final Product – Garage Shop and Makerspace Remodel
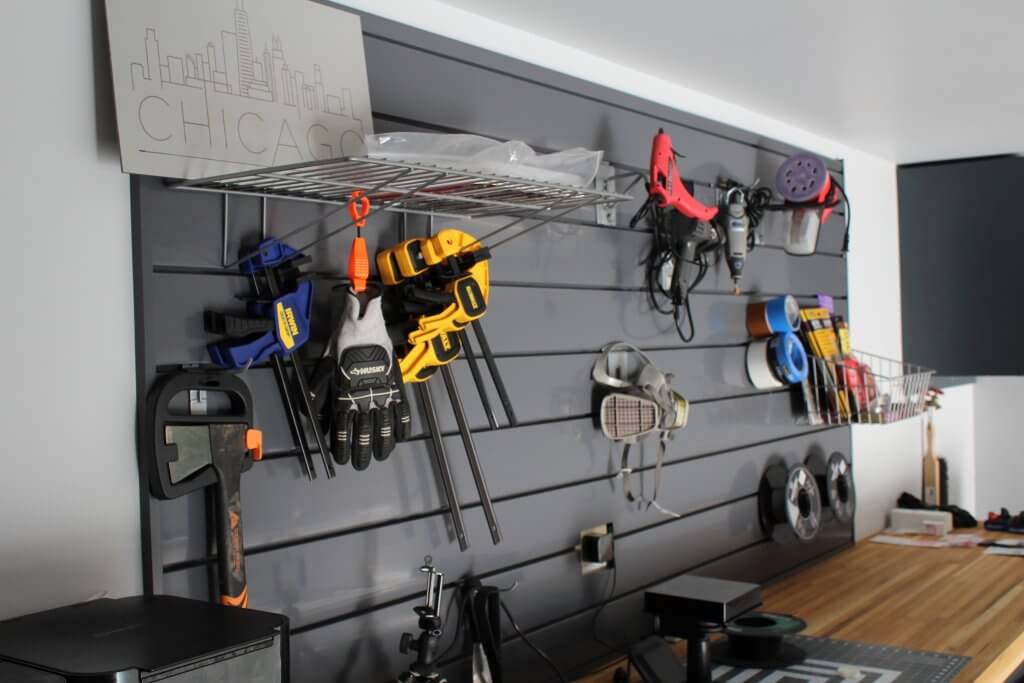
It was a long road to get up to this point. The garage shop and makerspace remodel was almost complete. Now it was time for finishes. I only needed a few things to finish things off and make the shop fully functional. We had our cabinet builder make us a slat wall for above the work bench. Slat wall is a modern, better-looking take on peg board. Its essentially a wall system that accepts brackets of varying shapes and sizes which allow you to hang all of your go-to tools right there on the wall. Its a great space-saving technique and it looks really good too!
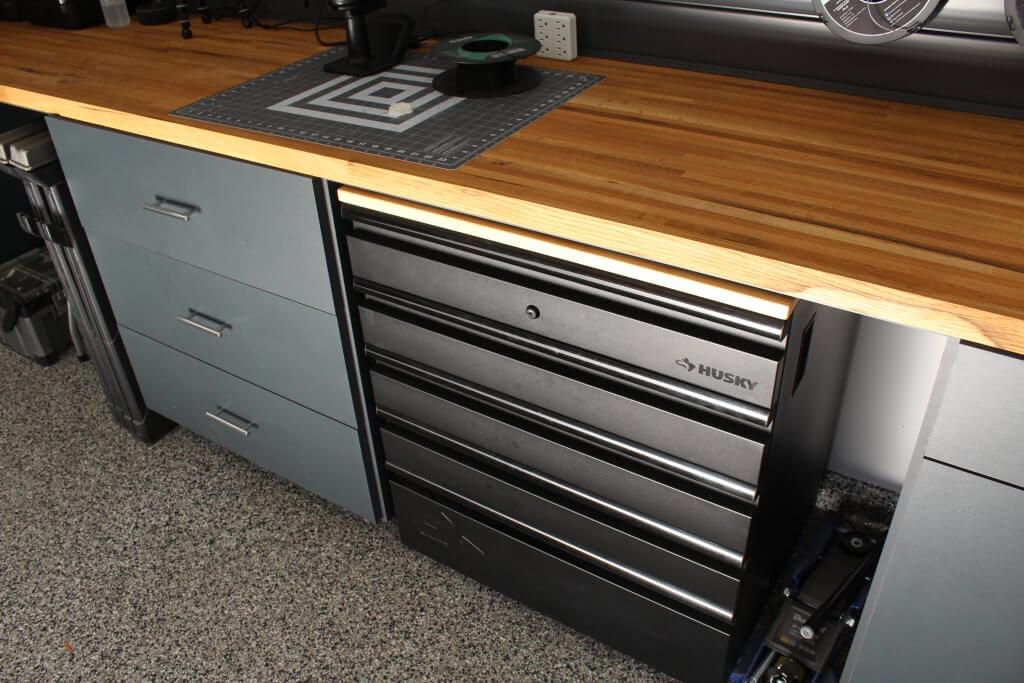
Another late edition was the Husky Five-Drawer tool chest. This is a beautiful addition. The tool chest comes in a lovely flat black finish. It comes standard equipped with five deep slow-closing drawers which is great for organizing all your favorite hand tools. The chest also has a beautiful butcher block top that doubles as another work surface.
Casters allow the chest to become mobile around the shop, and are a purchasable add on. The stock Husky casters would have made the chest a little too tall tuck away under the work bench however. Purchasing some low profile casters from McMaster helped me get around this. Now the tool chest fits under the work bench and rolls around the shop like a dream. This also gave my shop an additional work surface, since now I can roll the chest out to the middle of the shop floor and use it as an island for specific tasks.
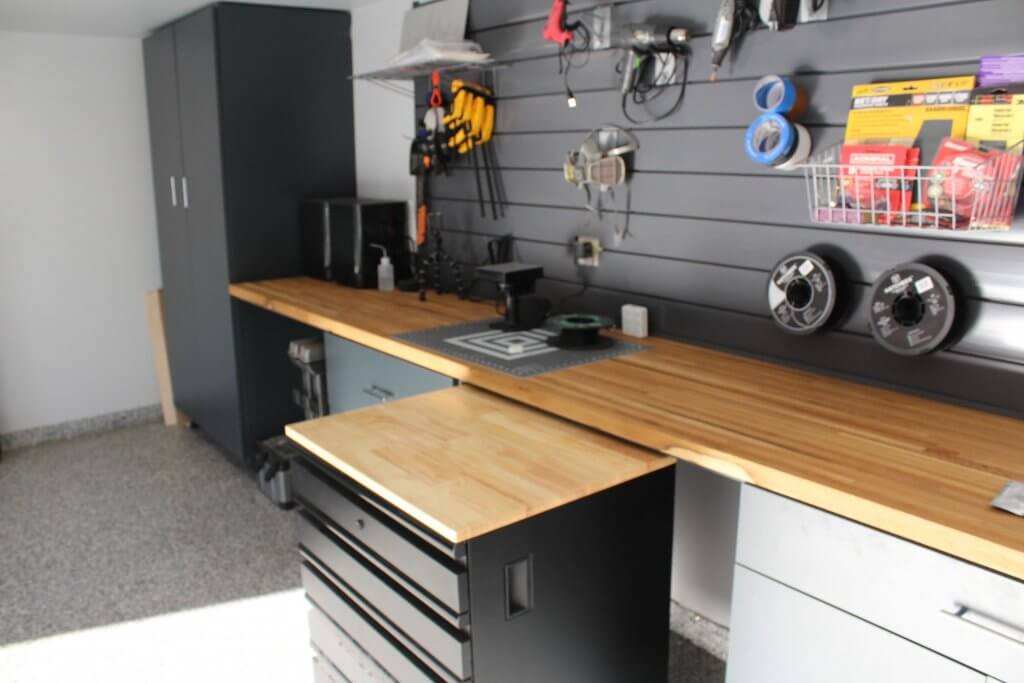
A lot of work went into creating this shop of ours. Boy was it worth it. The garage shop and makerspace remodel was now complete. It was a long road to get to this point, but crafting this creative space for making was quite enjoyable. At this point I got all the tools and equipment organized. I’m really excited about this shop. Now its time to get making!
Resources Discussed in this Article
- Epoxy Floor
- Husky 5-Drawer Tool Chest –
- Floor & Decor 144″ x 25″ Raw Maple Counter Top
- Cabinet Builders
- Wall Mounted Heater
- Surface Mounted Wiring System
- Sherwin Williams Super Paint

